
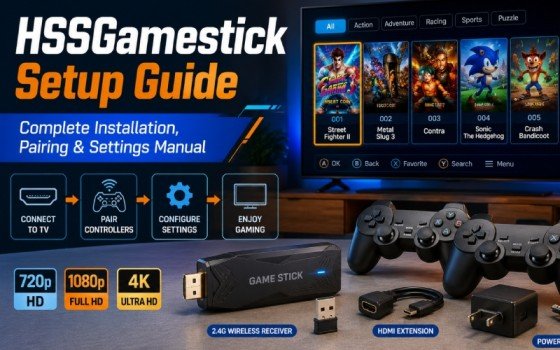
You just unboxed your HSSGamestick. You plug it in, turn on the TV, and nothing works. The box manual skips half the steps. This guide covers everything from physical setup to pro settings, so you start playing in minutes.
What Comes in the Box
Before touching any cables, check that all parts are present. One missing piece will stop your setup completely.
| Item | Purpose |
| HSSGamestick (HDMI dongle) | The main console |
| HDMI Extension Cable | Protects the port and improves signal |
| 2 Wireless Controllers | Solo and two-player gaming |
| USB Wireless Receiver | Connects controllers to the stick |
| USB Power Cable + 5V Adapter | Powers the device |
I noticed that in maximum boxes USB wireless receiver is missing. If this happens with you immediately contact with your seller. Without USB wireless receiver your controller will not work at all.
Step-by-Step Physical Setup
Step 1: Connect the HDMI
Find free HDMI port on your TV. Plug the HSSGamestick into that port. Space maybe tight behind the TV. In this case you may use HDMI extension cable. It provides dual benefit. Firstly it prevent the stick from bending and secondly it move the receiver away from TV electronics that improve the signal range.
Step 2: Plug in the USB Receiver
Plug the small USB wireless receiver into the USB port on the HSSGamestick itself, not into the TV. Most setup failures happen because people skip this step entirely.
Step 3: Use the Right Power Source
Connect the USB power cable to the HSSGamestick and plug the other end into the included 5V wall adapter. Do not use your TV’s USB port. Most TV USB ports do not supply consistent power. This causes the most common complaint among new users: a black screen on startup. The wall adapter solves this immediately.
Step 4: Switch TV Input
Turn on your TV and select the correct HDMI input using your remote. The HSSGamestick main menu appears within a few seconds.
How to Pair Your Controllers
First press and hold home button present on controller. Press for 3 to 5 seconds. The indicator light with flash and then go solid. The Screen will recognize it from away.
If the controller does not connect, replace the batteries first. Low batteries mimic connection failure and cause button lag that looks like a hardware problem.
Resolution Settings HSSGamestick
To set resolution go to settings and find display option. Set the resolution 1080p. 1080p resolution is best balance for sharpness and performance on modern TV sets. But it can affect your game speed. If it becomes slow then try 720p. Set the frame rate to 60 FPS for smooth motion in fast games.
| Resolution | Best For |
| 720p | Older TVs or slow performance |
| 1080p | Most modern TVs, recommended |
| 4K | Large 4K screens only |
Controller Settings HSSGamestick
Go to Settings and select Controller or Input Configuration. Here you can remap every button for each emulator separately. The HSSGamestick saves each map permanently, even after you power off. You build your layout once and never touch it again.
Set the Dead Zone between 10% and 15%. If your character drifts without you touching the stick, raise the dead zone slightly. For racing games, set Linearity to 80% or higher for smooth, predictable steering.
For players who also use a mobile companion app alongside their device, the detailed breakdown of DualMedia mobile app features covers compatible controller apps that work with plug-and-play retro consoles.
Manual Settings HSSGamestick: Profiles and Save States
The HSSGamestick supports up to 4 to 5 user profiles. Each profile keeps separate game progress and button maps. Go to Settings and select Profiles to create one. This is ideal for households with multiple players.
During any game, press Select and Start at the same time to activate Save State. Your progress saves instantly, even in classic games that had no built-in save system.
Quick Troubleshooting
| Problem | Fix |
| Black screen on startup | Use 5V wall adapter, not TV USB port |
| Controllers not connecting | Plug USB receiver into the stick, not the TV |
| Button lag | Replace batteries |
| Game will not load | Switch emulator core in game settings |
| Poor picture | Set resolution to 1080p in display settings |
| Audio crackling | Lower volume to 75% in audio settings |
Most problems trace back to wrong power source or missing USB receiver. Fix those first.
Apply these settings on your first session. Set your resolution, map your buttons, create a profile, and use Save State from day one. Your experience improves immediately and stays consistent every time you play.